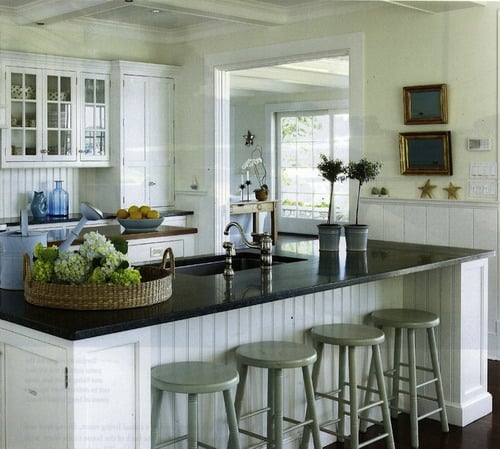
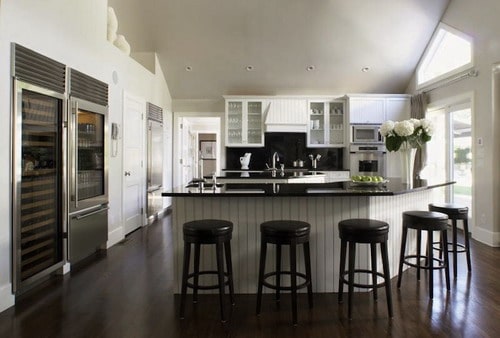
Kitchen peninsulas often become the hub of the room. You prepare meals there and your family and friends gather around the peninsula to eat, do homework and visit. It’s inevitable that the finish on the sidewall of the peninsula shows signs of wear and tear. It’s easy to trim a kitchen peninsula with beadboard to cover any blemishes. In a kitchen or dining area with beadboard wainscoting, matching beadboard helps coordinate the space. In a kitchen without other beadboard, the grooved panels add vintage charm and texture.
How to Trim Kitchen Peninsulas
- Remove the molding around the base and top of the peninsula by prying it off with a pry bar. Remove the screws holding any corbels or braces in place. Set the corbels or braces and their screws aside to reuse.
- Measure the height of the peninsula. Measure the width of the front and sides. If the back of the peninsula is solid, measure it as well. Cut sheets of beadboard to fit the dimensions, using a circular saw. Make cutouts for outlets and other obstacles with a jigsaw.
- Spread a generous bead of carpenter’s glue on the back of a piece of beadboard. Set the beadboard in place against the peninsula with the grooved edge facing an outside corner. Secure the beadboard section with 4d nails, spacing the holes 6 to 8 inches apart.
- Apply carpenter’s glue to the next piece of beadboard. Slide the second board’s groove over the first board’s tongue section. Secure the board with 4d nails. Continue to the end of this section. Cover the sides and back of the peninsula with beadboard as well.
- Measure and cut four pieces of corner trim molding with a circular saw. Run a bead of carpenter’s glue on the back of the corner trim. Attach the molding with 4d nails.
- Measure and cut molding for the top and bottom of the peninsula. Use a miter saw to cut 45-degree angles on the corners. Apply some carpenter’s glue to the back of the molding and put it in place. Secure the molding with 4d nails.
- Set all the nails slightly below the surface with a nail set tool. Fill the holes with matching wood putty. Wipe off any excess putty with a soft rag.
- Paint the beadboard and the trim with a coat of primer. Allow the primer time to dry following manufacturer’s guidelines. Apply two coats of paint allowing each to dry before proceeding.
- Hold the braces or corbels back in their original position. Mark the location of the screw holes on the peninsula front. Drill pilot holes in those spots. Reattach the braces or corbels with their screws.


Things You Will Need when Trimming Kitchen Peninsulas
- Pry bar
- Screwdriver
- Tape measure
- Circular saw
- Beadboard
- Carpenter’s glue
- 4d nails
- Hammer
- Trim molding
- Nail set
- Wood putty
- Soft rag
- Primer
- Paintbrush
- Paint
- Drill and drill bits
Tip
- It’s possible to purchase pre-finished beadboard and trim, so all you need to do is cut and install it.
Warning
- Use safety gear when using power tools.
https://www.youtube.com/watch?v=A1jqe5JKRZI