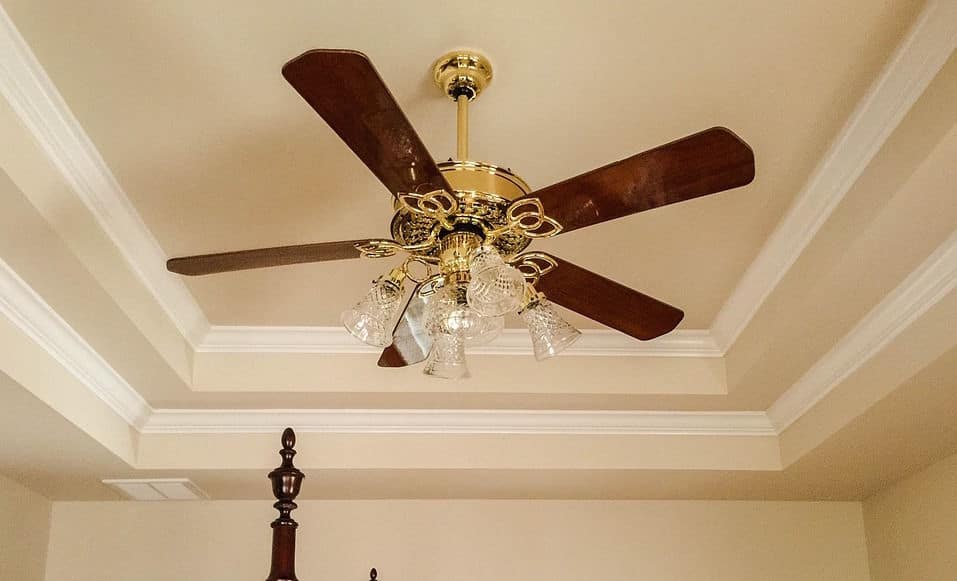
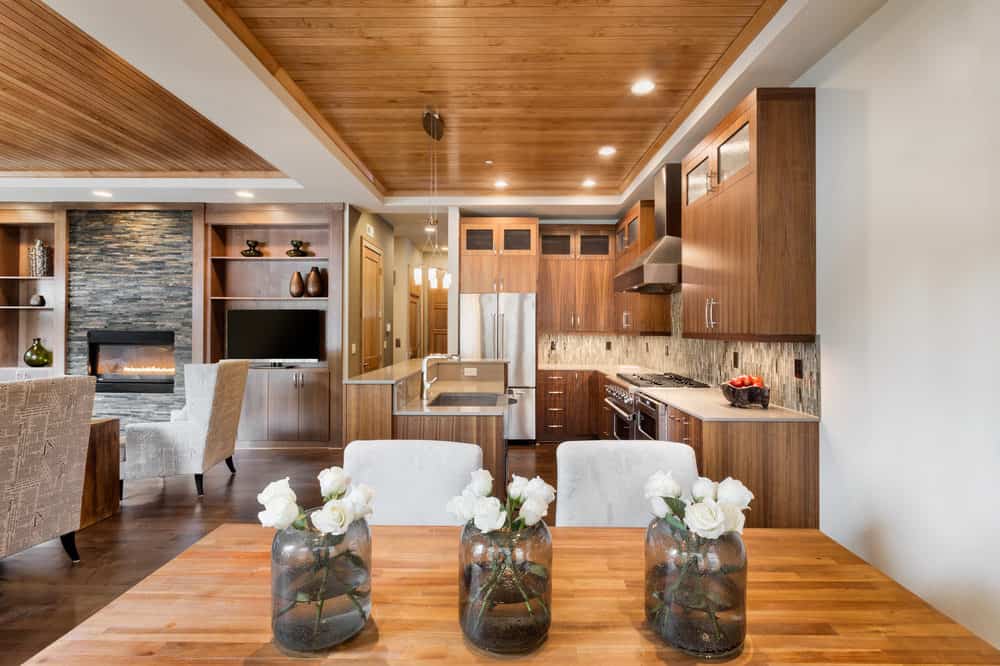
Also referred to as an inverted or recessed ceiling, a Tray ceiling is an overhead closure with a visual resemblance to a tray. It has a center section that could be several inches or several feet higher (there is no fixed height) than the areas around the perimeter of any room it is being built in. It is best suited in large rooms with high ceilings and the focal length which happens to be a spot for fixing chandeliers, ceiling fans, or pendant lights is created by the higher center of the ceiling.
Benefits of Tray Ceiling
- A major advantage of tray ceilings is their contribution to a touch of elegance and luxury. The visual feel of wherever they are being built or placed is extremely transformed into something aesthetically rich, enchanting, and beautiful.
- Tray Ceilings, practically, increase the space and height of rooms and practically conceals wiring or plumbing within areas of its drop-down border.
- They offer spots and positions for the installation of special lighting schemes which include recessed lights, accent lights, and LED lights which positively affect the ambiance of any living space.
- They can be altered to fit personal preferences or specifications visually creating a dynamic impact.
- They contribute to energy efficiency.
- The vaulted ceiling permits the easy entrance of natural light into the home thereby adding more value.
- With the construction of Tray Ceilings, it is easier to visually separate different segments of large areas.
Disadvantages/draw-backs of Tray ceilings
- Reduction of headroom due to the presence of a drop-down border which could make the room feel confined and cramped.
- If employed in a kitchen where the ceiling is not very high, the tray ceiling could dictate the size of the cabinets to be used because the drop-down border reduces the space meant for the cabinets.
- The presence of two different heights and multiple edges makes it difficult to paint and clean.
- Tray ceilings cannot be completed without a drop-down border.
- Cannot be employed in rooms with short walls because the headspace is reduced by drop-down boundaries.
Tray Ceiling Installation
The installment process depends on two major factors;
- Whether the ceiling was constructed during the building of the house as part of the initial blueprint.
- Whether the ceiling is going to be remodeled.
-Installation for already existing design (built-in)
Here the tray installed will not require lowering the height of the ceiling for the accommodation of the drop-down border.
-Remodelling before installation
This requires modification of ceiling trusses which should only be done after consultation with the manufacturer of the roof trusses or a structural engineer. In some cases, modifying the framing may not be safe or structurally sound.
Usually, before remodeling, permits are obtained. This is because the structural body of the home is going to be altered and it is a job left to be performed only by professionals.
However, If the height of the ceiling allows for the installation of a drop-down ceiling the process would be made much easier and would not require recessing the tray which does not particularly require a professional as someone with basic carpentry knowledge can achieve this.
The remodeling process can also be achieved by the installation of a faux tray ceiling which, just like the employment of drop-down ceilings, does not require a pro. The center of the ceiling is painted with a darker color than the surrounding border creating the tray effect.
Materials Used for Ceiling Construction

A good number of tools and materials used are similar to those used for a wall which is drywall.
Drywalls are the most common by far and are also referred to as gypsum wallboard. However, while they are the most conventional materials to employ, drywall materials are difficult to utilize and involve countless tapping, sanding, and mudding before completion of construction. Utilization is a long and time-consuming process that requires a lot of labor. Maintaining drywall is difficult and it is also prone to damage with barely enough or a sustainable degree of durability and/or guarantee. It can be easily ruined by children, pets or younger adults, and damages created are also very visible.
The problematic features of drywall have warranted the discovery of better and more reliable options. Other materials that serve as alternatives include;
- Lath and Plaster; are narrow strips of wood installed horizontally between ceiling joists or studs. The addition of texture to the wall improves the look. They can be used for walls that are not flat, like curved surfaces or room corners, and flexibility permits use for the creation of unique designs.
- Wood planks; provide elegance and a feel of aesthetic and also have proven to stand the test of time with easy maintenance as all that has to be done is to constantly keep them dry. It is perfect and suitable for country-style homes. Another advantage is the availability of varieties as they are different types of wood finishes to choose from. This option is unfortunately not suitable for modern homes as they went out of style decades ago.
- Veneer Plaster; this is one alternative that tends to have a close similarity to traditional drywalls although it is much easier to put into use. It does not require as many tools and processes as drywalls.
- Plywood and sheet wood; this is the cheapest alternative which allows a perfect finish without loads of expenses and like wood planks they also give to any living space that country feels. It is easy to work with the simple use of screwdrivers or power drills.
- Texture wall panels; with a provision of depth to flat surfaces, these walls contribute to the beauty of any living space. At first, they were only used for boutiques, cocktail lounges, and hotels until their employment of use in homes. The availability of 3D texture panels makes it easy to install or place on already existing walls.
- Brick and Masonry; warm, cozy, and an achievable aesthetic come automatically. Although more expensive than drywall, they are absolutely more sustainable.
- Concrete block; this is aesthetic also but way more advanced and modern.
More alternatives include;
- Pegboard
- Pressed metal panels
- Metal grids
- Fiberglass acoustical board
- Translucent plastic panels
- Paint
- Tin tiles
- Moldings
- Plasterboard
- Wahoo walls
- Reinforced fiberglass and gypsum panels
- Corrugated metal
- Vinyl siding
- Cement board
How to Accent a Tray Ceiling
- The use of a high gloss finish for the ceiling
- Uncovering the architectural structure of the ceiling
- Painting the ceiling white
- Use of recessed lighting
- Painting the ceiling down to the walls with the same colour
- Thinning or absolute removal of crown holding
- Use of matte finish on the ceiling
Design Ideas
Tray ceilings represent depth and style and better still, they promote an expensive look without having to cost too much. They can be outlined by flat trimming using flat wooden trim boards positioned outside the edge of the tray or flat against the top of the tray.
- Designs with metal details
- Blue paneling
- Use of colorful strips
- Geometric dressings
- Using the ceiling as a spot to promote creativity by adding art.
- Decoration with the two-toned paint job.
- Use of multiple layers of molding.
- Use of planks to decorate
- Use of paint to highlight an already existing design
- Addition of built-in lighting and extra beams
- Use of same color of paint as with the walls
- Use of colors different from that of the walls
- Installation of faux stars using optical fiber lights
- Addition of accent lighting
- Addition of neutral and durable tiles
- Addition of layers to improve height
Tray Ceiling Cost
It is much less expensive to install or project a tray ceiling while building a new home than to have it redesigned to achieve the purpose.
Location and type of project influence the price of Tray Ceilings. Customarily, homeowners spend about $2-$4 per square foot for installation.
In newly constructed homes the cost could amount within the range of $500 -$1,500 per ceiling.
What is a Reverse Tray Ceiling?
This shares great similarity to that of a traditional tray ceiling in the sense that there is a difference in height of the center of the ceiling contrasting with the perimeter. In the reverse ceiling, the center is lower than the perimeter rather than the center being taller.
Difference between Coffered Ceilings and Tray Ceilings
Coffered Ceilings are simply gridded often made of carved stone or expensive wood. Unlike the tray ceilings, it is not a modern pattern. In this pattern, indents are serially introduced to create a 3D design. Mostly, creation is by the use of beams to make rectangles and squares. They tend to lessen ceiling load, cover up wavy ceilings and improve acoustics by absorbing excess sounds providing effective noise control and also adding to the resale value of a home. It has the most popular depth using a 4-5/8″ crown and taking up 4″ from the face of the grid to the back of the coffer.
Tray ceilings on the other hand are made or constructed by raising a single area of a ceiling in the center that surrounds a dropped border running along the perimeter of a room.
Other types of ceilings include;
- Beam ceiling
- Coved ceiling
- Cathedral ceiling
- Suspended ceiling
- Conventional ceiling
- Shed ceiling
If what you desire is an escape from the plain and simple feel of your home and transit to a more pleasing atmosphere, tray ceilings are amongst the top options available for achieving that transformation. With easy, doable, and accessible designs, you are steps away from providing yourself with a brand new ambiance right where you live.