 Two-level plasterboard living room ceilings, photos of which decorate the sites of construction companies in great abundance, can be done independently. After all, such a versatile and affordable material as drywall helps to embody the most non-trivial design idea. In order to radically transform the most ordinary apartment, you need to have plasterboard sheets, metal profiles and desire.
Ideas for two-level ceilings for the living room from drywall
Design fantasy has no boundaries. Who could only predict 10-15 years ago that “Roman” molding is not at all the limit of decoration for ceilings. It was impossible to imagine that the image of the sky could be easily “transferred” to any ceiling, creating the illusion of the presence of clouds or a stellar vault above your head, that it could very well look colorful and thematic, and not just a white square, that an “uneven ceiling” would mean unacceptable marriage is work, but multi-level.
Modern renovation necessarily involves paying enough attention to the ceiling and presents a lot of options for improving the living room by constructing the ceiling from the GKL and decorating it. Suspended structures made of drywall are distinguished by a variety of shapes and patterns, the number of decorative elements and the type of lighting:
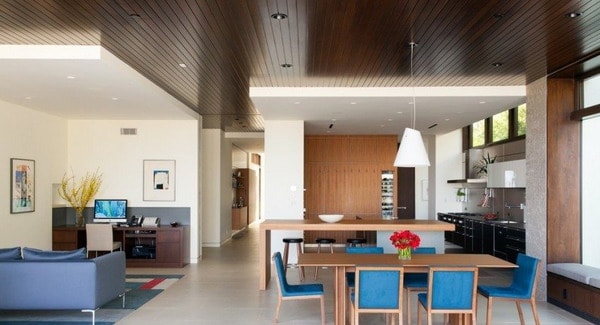
- concise two-level drywall ceilings for the living room, photos of which are distinguished by clearly marked lines, are made in high-tech style. Typically, designers want to highlight the perimeter, or to focus on one of the corners, outlining the desired object with straight or wavy contours. Moreover, spotlights are localized in this place ;
- elegant pretentious ceilings with a decor that goes beyond the usual, but also does not reach excessive. On such ceilings there may be sculpting, different types of decor or several shades of coloring combined. The elegance and originality of such a living room can be given by a certain theme, which focuses on the ceiling zone: floral motifs, yin and yang, arches, steppedness, transition of zones with different lighting (when one pattern becomes an extension to another, however, it differs somewhat stylistically or by the intensity of the organization of lighting) ;
- the ceiling turning “to the floor” is one of the most original solutions. His main idea is one element that combines the space between the floor and a two-level ceiling. It can be a block that divides the living room into zones, located in the center of the ceiling and descending to the floor. The figured over-arch arch, which is a descending part of the ceiling, looks good in the interior. Remarkable is the niche for the TV, which is made in the form of a wavy or strict element appearing from the floor. He reaches the ceiling and “dissolves” in it.
Plasterboard ceilings for the living room, the photos of which depict any, the most non-standard ideas, make the interior of this room unique.
Useful advice! If your apartment is located in an ordinary panel high-rise building, then you do not need to get too carried away, creating many levels. To update the type of apartment, two is enough. Otherwise, the ceiling may be too low and overhanging.
How to build a two-level ceiling made of drywall with your own hands
It doesn’t matter how many levels the plasterboard ceiling has . The principle of their construction is always the same. The difference is only in the final decoration and design. Well, the more levels and decorative elements, the more labor and material will have to be spent. Before starting the installation of a ceiling with two levels, you need to evaluate the height of the room. Two levels will take at least 10 – 15 cm, so if such losses are significant, then it is better to abandon the idea.
If the “native” ceiling is quite flat, then the second level can be mounted directly on it. This will save space. The more complicated the design is, the more accurately the calculations need to be done. Yes, and assistants will need more. One is hardly possible to do a quality job. It is better if you have a detailed project or at least a sketch of the ceiling.
What materials and tools will be needed
To produce the whole cycle of works on installing a two-level ceiling from gypsum cardboard with your own hands, you will need the following tool:
- no less than 5 meter tape measure;
- construction knife;
- cordless screwdriver ;
- manual punch;
- sandpaper;
- two building levels, both bubble and hydro;
- starting, longitudinal and bearing metal profiles;
- dowels and screws;
Plasterboard bulk strips on the ceiling
- special compound for profiles called crab;
- plaster suitable for drywall;
- drywall grout;
- GKL planer;
- scissors for cutting metal;
- textile gloves and safety glasses;
- CD and UD profiles;
- wedge anchor for fastening;
- angular and two-level connectors.
As a basis, they use the usual 9.5 mm ceiling gypsum board, and for the installation of the second tier it is better to use arched, having a thickness of 6 mm.
Useful advice! When the living room is small, you do not need to overload its space, creating too bulky structures on the ceiling. This will reduce the room by half. The best solution for small rooms is a flat ceiling of white classic color. It is sometimes possible to mount a box of drywall, and install spotlights along the walls.
The construction of the ceiling step by step
In a few steps you can build a two-level plasterboard ceiling for the living room. Photos of each of them can be studied in detail.
Step 1 . Clean the room in which the installation will be carried out, from furniture and all foreign objects. Measure the height of each corner. The lowest becomes a reference point for marking. Use the levels to draw the necessary marking lines. No need to draw too much in order not to get confused.
Step 2 . Start attaching UD profiles first. They are mounted on the wall around the perimeter of the entire room, as they are load-bearing. On the points that you marked on the ceiling, install a direct suspension, and on it a CD profile. To give the structure the necessary rigidity, be sure to use crabs. Sew up the resulting framework with sheets of drywall.
Step 3 . For marking the second level, the lines for installing profiles are not drawn, but the drawing is applied directly, which is a prototype of future geometric figures on the ceiling. Even if you follow the instructions strictly, you will not always get the perfect plasterboard ceilings for the living room. Photos of some “masterpieces” confirm this. And all because, in addition to the skill and accuracy of installation, you also need to be able to draw. If you don’t have the ability to do this, it’s better to ask someone not to spoil all your work.
Step 4 . Ceiling (UD) frame is fixed on the ceiling and wall, rounding and giving, if necessary, the shape corresponding to the drawn pattern. To lower the frame to the desired length, use a CD profile. It is cut into pieces of design length and sharp cuts are made at one end. They are inserted into the guide UD profile with even edges every 500-600 mm. After that, when they all stand upright, they put on a UD profile and fasten the finished structure. To get a more reliable frame, make another piece of CD profile, equal in size to the distance from the wall to the side edge. It is mounted between the sidewall and the UD profile on the wall.
Step 5 . When our frame is ready, little by little we begin to sheathe it with drywall cut out according to the template. To give rounding, you can use an awl, which makes a lot of punctures along the fold line, and wetting with water. In conclusion, the seams are carefully putty and the backlight is installed, the wires for which must be pre-drawn along the profiles.
Useful advice! If you use LED illumination hidden from the eyes, and even with a multi-colored glow, then you can enhance the perception of a certain non-standard plasterboard ceiling for the living room. A photo of the various backlight options confirms this.
With proper installation and possession of some imagination, you can get unique two-level plasterboard ceilings for the living room. A photo depicting each step of the whole process will help in this intricate and creative endeavor.